Monday, January 26, 2009

Turkey Miso Soup

I have been told that this is not soup, it is much to chunky. Well too bad, this is what I call soup! I like lots of big pieces and general numminess, perfect for pairing with some crusty bread.

This soup was inspired by the fantastic mirepoix from the November R2R challenge: Squash Soup with Vanilla Crème Fraiche.

Turkey Miso Soup
1 sliced leek bottoms (rinsed)
2 carrots (peeled and sliced)
2 shallots (peeled and sliced)
2 clove garlic
butter
honey
miso
Salt and pepper
Turkey
Broth

Sweat all of the vegetables with butter. Sweat down and deglaze with honey. Stir and add miso. Season with salt and pepper. Add honey and miso to taste I used about a tablespoon honey and 2 or 3 of the miso.

Add turkey and broth till you reach your desired proportions.

Serve with warm crusty bread and a hearty appetite!

Tempers Take:
I love Miso, it adds depth to so many things. This soup was my latest experiment and boy was it good.

I've been a very good Girl!

I must a been a very very good girl last year. How else would you explain these? Homemade cutting boards!

On the other hand my computer has been very very bad, I was down for another two weeks (video card and reinstalling windows). I am back up for now, My monitor is a little funky so if the color on my images is a little off I apologize.

Tax season has also started, that means 4 months of 60 hour weeks. How this will effect my posting I have no idea, I will probably do more batch posting. Cook and take pictures and then post several things all at once.

In that spirit I have three posts today! lucky you!

Tuesday, January 13, 2009

Georgia Street Squares

Georgia Street Squares were a treat my grandmother made for fancy get togethers. I always knew she did not invent the recipe but could find no clue as to their origins. Until I started food blogging and saw them on Food Gawker where for some reason they were called Nanaimo bars. Since the name is definitely hard to pronounce I can see why she changed it, but why Georgia Street Squares I don't have a clue.

What they are is delicious, delectable, addictive and fattening (we figured it up once, 4 pts for a 1 inch square). Any time I show up at a family gathering these are what I am expected to bring. And the best part? They aren't that hard to make.

Georgia Street Squares
BOTTOM LAYER:
1/2 cup coco powder
1/4 cup sugar
1/2 cup butter
1 tsp vanilla
1 egg, slightly beaten
2 cups crushed Graham crackers
1 cup flaked coconut (the sweetened variety works best)
1/2 cup chopped nuts

In a saucepan over low heat, melt the butter. Stir in the sugar and cocoa powder and then gradually whisk in the beaten egg. Cook, stirring constantly, until the mixture thickens (1 - 2 minutes). Remove from heat and stir in the vanilla extract, graham cracker crumbs, coconut, and chopped nuts. Press the mixture evenly into lightly buttered 9X13 pan. Cover and refrigerate until firm (about an hour).

FILLING:
1/2 cup butter
3 Tblsp milk
2 tsp instant vanilla pudding mix
2 cups powdered sugar

In your electric mixer cream the butter. Beat in the remaining ingredients. If the mixture is too thick to spread, add a little more milk. Spread the filling over the bottom layer, cover, and refrigerate until firm (about 30 minutes).

TOP LAYER:
3/4 cup chocolate chips (I usually use 1 cup)
1 Tblsp butter

In a heatproof bowl over a saucepan of simmering water, melt the chocolate and butter. Spread over the filling and refrigerate. (add milk for a better spreading consistency)

TO SERVE: To prevent the chocolate from cracking, using a sharp knife, bring the squares to room temperature before cutting.


Temper's Take:
I have tried variations, adding some amaretto to the middle layer was definitely yummy, and I like using french vanilla pudding even if it does make the layer slightly yellow. though these Raspberry Nanaimo Bars from Cake or Death.
Cakespy also has a good little article on them here and some really nice pictures.

Saturday, January 10, 2009

What I did during December.

I had a very busy December. I spent the first part of the month trying cookie recipes and the last half making candy and the Xmas necessities. Here is a list of my successes and failures.

I tried two cookies from the Gourmet's magazines favorite cookie list. The same two everyone appears to have done.

The first one was their Brown Butter cookies. I love brown butter cookies, taste wise, I am not however thrilled about the sandy texture they all seem to have. I am at the point now where I am going to try making my own recipe. these were easy and nice tasting but way to crumbly.

The Sugar Shuttles where a bit of a disappointment. I was promised a soft sugar cookie and what I got was a dense lump. The sugar coating was brilliant though and I will definitely keep it in mind for other projects.

Also on the fail side of the list was Twisted Yeast Cookies from one of my favorite bloggers Vera of Baking Obsession. There is nothing wrong with her recipe, it just wasn't what I expected, a little more breadsticky then 'caramelized puff pastry palmier' for my taste. They were very pretty thought and Indra especially liked the breast cancer ribbon looking ones. It was a cool idea and one I may play with to make something more to my taste.

I also tried a new sugar cookie recipe. I know I should have stuck with my old favorite, but this one was from Pillsbury. Classic Sugar Cookies (pictured above), Unfortunately while good weren't what I really wanted Land O'Lake's BEST EVER BUTTER COOKIES. Or my great aunts' recipe that I haven't managed to weedle out of them yet. they were just a little to soft and not buttery enough. Santa seemed to like them just fine though.

Now for the successes, Mandelbrodt, Jewish Biscotti, definitely the good stuff. it was easy and oh so good. Definitely better then the biscotti I made earlier, but that may just be because I am partial to cinnamon and sugar. I thought about dipping them in chocolate but decided they were perfect as is. When it comes to baking those Jewish people know what they are doing. This one is on my make again and again list. And as a bonus it was easy.

I also made the GOLDEN VANILLA BEAN CARAMELS from the November's Daring Bakers Challenge (recipe follows). This reaffirmed my hatred of working with hot sugar. The end results were so Luscious that Indra immediately vetoed my plan to share with friends and told me to go make some more. I think I will be making more of these in the future, next time she gets to wrap them though.
GOLDEN VANILLA BEAN CARAMELS
- makes eighty-one 1-inch caramels -
Ingredients
1 cup golden syrup
2 cups sugar
3/8 teaspoon fine sea salt
2 cups heavy cream
1 1/2 teaspoons pure ground vanilla beans, or 1 tablespoon plus 1 teaspoon pure vanilla extract
3 tablespoons unsalted butter, cut into chunks, softened


Procedure

Line the bottom and sides of the baking pan with aluminum foil and grease the foil. Combine the golden syrup, sugar, and salt in a heavy 3-quart saucepan and cook over medium heat, stirring with a silicone spatula or wooden spoon, until the mixture begins to simmer around the edges. Wash the sugar and syrup from the sides of the pan with a pastry brush dipped in water. Cover and cook for about 3 minutes. (Meanwhile, rinse the spatula or spoon before using it again later.) Uncover the pan and wash down the sides once more. Attach the candy thermometer to the pan, without letting it touch the bottom of the pan, and cook, uncovered (without stirring) until the mixture reaches 305°F. Meanwhile, combine the cream and ground vanilla beans (not the extract) in a small saucepan and heat until tiny bubbles form around the edges of the pan. Turn off the heat and cover the pan to keep the cream hot.

When the sugar mixture reaches 305°F, turn off the heat and stir in the butter chunks. Gradually stir in the hot cream; it will bubble up and steam dramatically, so be careful. Turn the burner back on and adjust it so that the mixture boils energetically but not violently. Stir until any thickened syrup at the bottom of the pan is dissolved and the mixture is smooth. Continue to cook, stirring occasionally, to about 245°F. Then cook, stirring constantly, to 260°f for soft, chewy caramels or 265°F; for firmer chewy caramels.

Remove the pan from the heat and stir in the vanilla extract, if using it. Pour the caramel into the lined pan. Let set for 4 to 5 hours, or overnight until firm.

Lift the pan liner from the pan and invert the sheet of caramel onto a sheet of parchment paper. Peel off the liner. Cut the caramels with an oiled knife. Wrap each caramel individually in wax paper or cellophane.


I also made truffles, White Chocolate Pumpkin Pie and German Chocolate balls. The pumpkin pie ones where made with a pumkin pie dip mix and rolled in gram crackers. The German Chocolate ones where inspired by the cake of the same name. I made a batch of the frosting (coconut, pecans and goey sugary goodness) that I had over cooked and after it had cooled rolled in German chocolate for a shell. they were very very nice (also on the make those again list for Indra).

What I didn't do, that I wanted to, make fudge, make date pinwheel cookies, make shortbread cookies, make chocolate truffles. still I think I managed to do pretty good. Next yr I am starting earlier though.

Tuesday, January 6, 2009

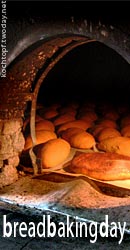
Bread Baking Day #16: Bread with Cheese


I feel very lucky to be the first host of the new year. I wish I was as eloquent as some of the past host in expressing my gratitude to Zorra founder of Bread Baking Daily for selecting me. I grew up baking bread of all description, I even baked bread while in the dorms at college (the air conditioning made that a real challenge) once I got out into the real world I suddenly found I lacked the time to make my own bread. When I started food blogging I searched for some challenges to keep me motivated. Zorra's Bread Baking Daily challenge was perfect and I have slowly started not only baking bread again but baking new breads. Thank you Zorra and all the other hosts.

Annarasa closed out the year with festive breads, which was a perfect choice. Apparently I am not the only one to think so. Check out the roundup here, here and here.

As far as I am concerned you don't need much more for a good meal then some fresh bread good cheese and some fruit. The combination of bread and cheese is a classic, what child doesn't love grilled cheese sandwiches or pizza? I was inspired by this recipe from King Arthur Flour for Gruyere Stuffed Crusty Loaves and a picture on Food Gawker. Who could resist that lovely molten cheese oozing from a bread volcano.

Any recipe you choose is fine as long as it incorporate cheese as a major flavor. Want to bake the bread and add the cheese later? Go ahead, I have nothing against grilled cheese sandwiches or quesidillas. After you post your cheese with bread baking experience on your blog, send your entry to me, at Tblackthorne AT gmail DOT com, with the following information:
Subject line of the email should begin with BBD16.
  1. Kindly include in English the following details:Your name, Your location, Your website’s name, your bread’s name and URL of the posting the bread(s) you chose to make

  2. Finally, attach a photo of your creation, size does not matter I will resize as needed (bigger is better).

  3. If your blog is not in English, then please send me a translation of your post in English or create the BBD post on your blog in English.

  4. If you do not have a blog but would like to be a part of this event, please send me your recipe and write-up (with picture, if possible) and I will include it in the round-up.

The deadline is the 1st of Febuary and I should have the roundup posted by the 5th.

Thursday, January 1, 2009

Taste and Create: Hokey Pokey

For this month's Taste and Create I drew Stef at Cupcake Project, under normal circumstances this would have meant cake, or rather Cupcakes! but with everything else I was doing for the holidays that wasn't happening. What I did choose fit in perfect with the rest of my holiday baking.

Hokey Pokey is brittle, honey comb candy and about a dozen other names that spell delicious (and easy). I opted to add nuts (I had a bunch left from other projects, and hey who doesn't like nuts?) dipped a few in chocolate and then hoarded the results. Hey look! after 30 some yrs of not even making good fudge I made candy! Its a Xmas Miracle!

Hokey Pokey by Nigella Lawson
1/2 cup sugar
4 tbs golden [dark corn] syrup
1 1/2 tsp bi carb [baking] soda

Put the sugar and syrup into a saucepan and stir together to mix. You can't stir once the pan's on the heat.
Place the pan on the heat and let the mixture first melt and then turn to goo and then a bubbling mass the color of maple syrup - this will take 3 minutes or so.
Off the heat, whisk in the baking soda and watch the syrup turn into a whooshing cloud of aerated pale gold. Turn this immediately onto a piece of baking parchment or greased foil.
Leave until set and then bash at it, so that it splinters into many glinting pieces.

Temper's Take:
I know the recipe says whisk but nuts and whisk don't mix. This was my only issue, other then some minor teeth sticking and washing the darn pot. This recipe is a keeper. :)

BBD: Grandma Skinner's Bread for all Occasions

Ok so I know that Bread for all occasions is not what it is really called, but that is what my Grandmother called it and I don't know the real name (if anyone does please share.)

Every year for Xmas we would get one of these frozen and wrapped in tinfoil. It was Grandma's thing and she refused to share the recipe so we couldn't make it ourselves. I managed to wrangle it out of her with a solemn promise not to share and not to make it at Xmas. She died at age 90 so I am now free to make my own holiday treats.

Grandma Skinner's Bread for all Occasions
4 loafs, servings depend on how greedy you are.
1 pkg Yeast
1/2 cup Warm Water
3 Tblsp Sugar
3 Egg Yolks
3 Egg Whites, Well Beaten
1/2 cup milk
4 cups Flour
1 tsp Salt
1 cup Shortening (Oleo)
3/4 cup sugar
1 1/2 tsp Cinnamon
1 1/2 cups Chopped Dates
1 cup Chopped Nuts

Soften the yeast in the water and 3 Tblsp sugar

Stir egg yolks together and add milk

Shift flour and salt together, then cut in the shortening until the mixture resembles coarse crumbs.

Mix yeast flour and egg yolks together to form a ball. Place in lightly greased bowl, turn over once to grease top. Cover and chill overnight

Divide dough into 4 parts - roll each part into a 13X7 inch rectangle

Stir cinnamon and sugar into the egg whites

Spread 1/4 of egg white mixture on each rectangle leaving 1/2 inch around the edge.

Sprinkle with Dates and Nuts.

Roll the rectangles up and place on baking sheet. Let rise until double.

Bake at 350 until light brown. Frost while still warm. Grandma always decorated hers with cherries and nuts. Me, I am simple, I like a little glaze and some hot chocolate.

R2R, Appetizers

Ok I was one of the hosts, and I was bad, I made one not two of the choices. I tried to make all three, that has to count for something right? Check out all three recipes on the Recipes to Rival Blog.

Lets start with my failures, Two pears sit in my fridge just waiting for toast and cheese, the grocery store and my procrastination did not come thru. Darn that bleu cheese! There is still hope though I have the pears after all.

I will admit I was looking forward to making the Oysters en Brochette. I wanted to, had the oysters all bought, all set to go and then I opened the package and smelled them. Couldn't touch them after that. When I was growing up I had exactly 1 oyster a yr, my father made me eat one in the oyster soup he made for Xmas, never could stand the things (loved the rest of the soup) I guess that has carried over. and I was really looking forward to them. :(

The Gruyère Cheese Gougères on the other hand were a raving success. If I had a stand mixer I would always have some of these. The Gruyère would be perfect with wine or fruit and I made a few with cheddar (Middle American here) and you know they were good too. I ate them fresh, ate them with soup, I ate them while I wrapped presents. The whole time I kept thinking these would be good stuffed with something, but they never seemed to last long enough for that to happen.

Monday, December 1, 2008

R2R:Squash Soup with Vanilla Crème Fraiche

This months Recipes to Rival challenge was Squash Soup with Vanilla Crème Fraiche as seen on Bravo TV's Top Chef a season or so ago. I have never had Squash soup before but it has intrigued me so I was glad of the opportunity. This recipe was just a series of discoveries for me.

The recipe as given is huge! and I do mean huge as one person put it 40 pounds of squash is a little much. I cut mine in 1/4th and used an acorn squash and 2/3rds of a pumpkin left over from the pumpkin Rendang (one of the perks of being a founder is I knew this challenge was coming.) I cheated a bit with the veggie broth, I started with canned and then personalized it. I was tempted to throw in some apple or pear peels but resisted, looking back I wish I had gone ahead.

The Mirepoix (had to look that one up on wikipedia) was fantastic, I kept coming up with other things I could use it for and wondering if I made a really big batch if I could freeze it. And the Miso was a revelation, there are definitely some possibilities there, glazed vegetable and I was thinking chicken (or turkey). Don't think I am quite ready for miso soup though.

I thought it was really clever to use a sage leaf to add flavor to the roasted squash. When it was done it was lovely and fragrant and almost made me say to heck with the soup, almost. I did not have a ricer or a decent immersion blender so I used my food processor. It worked sorta, (there were still little carrot flecks) but definitely good enough. At this point I froze half of the 'soup'.

There was alot of variation in soup thickness. I tried to get somewhere between porridge and broth, and ended up with something that was almost to thick to really be soup. Instead of Crème Fraiche, I used Greek yogurt with honey and vanilla.

Temper's Take:
I was disappointed. I am not sure if it was the veggy broth (not a big fan) the thickness, not being hot enough or me just really not being a fan of sour milk products. The whole time it was cooking I kept thinking bacon, and maybe some bacon crumbles or spiced nuts. I am letting it sit and trying it again, maybe I will thin it down a little more and add some more miso. We will see.

Saturday, November 29, 2008

BBD: Colored Breads

This one was a toughy, after deciding that brown (or any of its derivatives) was probably cheating and that is white a color argument to involved, I turned to Foodgawker and found the perfect recipe, Pumpkin Sage Rolls.

Even if these hadn't turned out yellow/orange I would have claimed they had and used photoshop to prove my point.

Pumpkin Cloverleaf Rolls (Family Fun Magazine)

Ingredients:
3-3/4 cups flour, plus more for sprinkling
1 pkg or 2-1/4 tsp instant or bread machine yeast
1 tsp salt
1/4 cup milk
1/4 cup honey
1/2 cup canned or frozen and thawed pureed pumpkin or squash
1 lg egg
1/2 cup water
8 fresh sage leaves, slivered (or 1-1/3 teaspoon dried leaves)
1/2 cup butter

Directions:
1. In a large bowl, mix together the flour, yeast, and salt, and set it aside.

2. Pour the milk into a microwave-safe bowl or 4-cup glass measuring cup and microwave on high for 30 seconds. Whisk in the honey, squash, egg, and water. (The liquid mixture should be less than 110°; anything hotter might kill the yeast.)

3. With a fork, blend the squash mixture into the flour mixture until you have a soft dough. Cover with plastic wrap and refrigerate for at least 1 hour.

4. Two hours before baking, turn the dough out onto a floured surface and knead 6 sage leaves into the dough. Melt the butter and set it aside in a small bowl. Divide the dough in half, then divide each half into 6 portions. Divide each portion into 3 pieces. With floured hands, roll each piece into a ball and dip it into the melted butter. Place 3 balls in a muffin cup. Continue until 12 muffin cups are filled.

5. Drizzle or brush each roll with 1/2 teaspoon of the leftover melted butter and then sprinkle them with the rest of the sage. Let the rolls rise in a warm spot (at least 70°) until they're double in size, about 1 to 1 1/2 hours. The 3 balls of dough will rise together to form a cloverleaf shape.

6. Heat the oven to 350°. Bake the rolls until golden, about 15 to 17 minutes. Makes 1 dozen.

Temper's Take:
These were a nice surprise, I expected them to be much more sagey then they were. The pumpkin really didn't do alot other then add some color and some moistness, maybe when I toast them the pumpkin will perk back up. I suspect that part of my problem was that darn room temperature thing, I really didn't get the rise I wanted and then I got impatient and didn't let them brown as much as I should. :(

They are exceedingly excellent with a trickle of Caramel syrup though. MMmmm

Cookie Carnival: Soft and Chewy Chocolate Chip Cookies

After a brief hiatus I'm back with another Cookie Carnival cookie. This one is a soft and chewy chocolate chip cookie, from Regan Daley from her absolutely fabulous MUST-HAVE book, In The Sweet Kitchen. Not my normal fare but hey chocolate chip cookies! gotta be good right? Yep, they were good, all three batches, only one approached soft though.

My problems? Room temperature may vary greatly from the norm with no central heat and I may have a wee problem with overcooking cookies. Maybe I will give them another go this summer when no air conditioning raises the temp a bit.

The Ultimate Chewy and Soft Chocolate Chunk Cookies

INGREDIENTS
1 cup unsalted butter at room temp
1 cup tightly packed light brown sugar
1/2 cup granulated sugar
2 large eggs
1 1/2 tsps. pure vanilla extract
3 cups plus 2 tbsp. all-purpose flour
1 tsp. baking soda
1/2 tsp. salt
16 oz. flavorful bitter or semi-sweet chocolate, coarsely chopped

INSTRUCTIONS
1. Preheat oven to 350 F. Line two baking sheets with parchment paper, or lightly butter them, and set aside. In the bowl of an electric mixer, or stand mixer fitted with paddle attachment, or a large bowl if mixing by hand, cream the butter and sugars until light and fluffy. Add the eggs, one at a time, beating well and scraping down the sides of the bowl after each addition. Beat in the vanilla.


2. Sift the flour, baking soda and salt together in a small bowl. Add the dry ingredients to the butter-sugar mixture, and mix until just combined. Fold in the chocolate chunks.


3. Using your hands, shape knobs of dough about the size of a large walnut and place them 2 inches apart on the baking sheets. Stagger the rows of cookies to ensure even baking. Bake 12-15 for smaller cookies, 14-17 for larger ones or until the tops are a light golden brown. If the cookies are neither firm nor dark when they are removed from the oven, they will cool chewy and soft. Cool the cookies on the sheets for 5 minutes, then transfer to wire racks to cool completely. If somehow they don't get inhaled immediately, they may be stored airtight at room temperature for up to one week.

Temper's Take:
Good cookies, nothing spectacular and Toll house still rocks my chocolate chip cookie boat.

Friday, November 28, 2008

DB: Bacon Caramel Cake

This months Daring Baker challenge was Caramel Cake with Caramelized Butter Frosting. The initial reviews came back OMG sweet but very good, and not being one to shy away from sugar I was looking forward to it. I will admit the Caramel portion of the recipe had me a bit worried me and candy just don't have a good history (I fail at no-fail fudge).

To put a spin on things work had a 'Bacon Off' where we were challenged to make a bacon flavored dessert. With a bit of help from Heather I tracked down Maple Bacon Cupcakes with Maple Frosting and wouldn't you know it the recipe looked awfully familiar. SO for this challenge I made Bacon Caramel Cake. (my changes are in green)

CARAMEL CAKE WITH CARAMELIZED BUTTER FROSTING
10 Tablespoons unsalted butter at room temperature (8 Tblsp Butter and 2 Tblsp Bacon drippings)
1 1/4 Cups granulated sugar
1/2 teaspoon kosher salt
1/3 Cup Caramel Syrup (see recipe below)
2 each eggs, at room temperature
splash vanilla extract
2 Cups all-purpose flour
1/2 teaspoon baking powder
1 cup milk, at room temperature
1/2 cup of minced bacon, cooked and drained

Preheat oven to 350F, Butter one tall (2 – 2.5 inch deep) 9-inch cake pan.

In the bowl of a stand mixer fitted with a paddle attachment, cream butter until smooth. Add sugar and salt & cream until light and fluffy.

Slowly pour room temperature caramel syrup into bowl. Scrape down bowl and increase speed. Add eggs/vanilla extract a little at a time, mixing well after each addition. Scrape down bowl again, beat mixture until light and uniform.

Sift flour and baking powder.

Turn mixer to lowest speed, and add one third of the dry ingredients. When incorporated, add half of the milk, a little at a time. Add another third of the dry ingredients, then the other half of the milk and finish with the dry ingredients.

Take off mixer and by hand, use a spatula to do a few last folds mixing in bacon bits at this time, making sure batter is uniform. Turn batter into prepared cake pan.

Place cake pan on cookie sheet or 1/2 sheet pan. Set first timer for 30 minutes, rotate pan and set timer for another 15-20 minutes. Your own oven will set the pace. Bake until sides pull away from the pan and skewer inserted in middle comes out clean. Cool cake completely before icing it.

Cake will keep for three days outside of the refrigerator.

CARAMEL SYRUP
2 cups sugar
1/2 cup water
1 cup water (for "stopping" the caramelization process)

In a small stainless steel saucepan, with tall sides, mix water and sugar until mixture feels like wet sand. Brush down any stray sugar crystals with wet pastry brush. Turn on heat to highest flame. Cook until smoking slightly: dark amber.

When color is achieved, very carefully pour in one cup of water. Caramel will jump and sputter about! It is very dangerous, so have long sleeves on and be prepared to step back.

Whisk over medium heat until it has reduced slightly and feels sticky between two fingers. {Obviously wait for it to cool on a spoon before touching it.}

Note: For safety reasons, have ready a bowl of ice water to plunge your hands into if any caramel should land on your skin.

CARAMELIZED BUTTER FROSTING
12 tablespoons unsalted butter (8 Tblsp Butter and 2 Tblsp Bacon drippings)
1 pound confectioner’s sugar, sifted
4-6 tablespoons heavy cream
2 teaspoons vanilla extract
2-4 tablespoons caramel syrup
Kosher or sea salt to taste

Cook butter until brown. Pour through a fine meshed sieve into a heatproof bowl, set aside to cool.

Pour cooled brown butter into mixer bowl.

In a stand mixer fitted with a paddle or whisk attachment, add confectioner's sugar a little at a time. When mixture looks too chunky to take any more, add a bit of cream and or caramel syrup. Repeat until mixture looks smooth and all confectioner's sugar has been incorporated. Add salt to taste.

Note: Caramelized butter frosting will keep in fridge for up to a month.
To smooth out from cold, microwave a bit, then mix with paddle attachment until smooth and light


(recipes above courtesy of Shuna Fish Lydon Also big thanks to the host this month; Dolores of Culinary Curiosity, Jenny of Foray into Food, Natalie of Gluten-a-Go-Go, Alex (Brownie of the Blondie and Brownie duo)

Temper's Take:
It may just be the sugar high talking but the bacon was pretty decent in this cake. The guys at work ate it all so they seem to have agreed (Indra didn't but I think she was still mad that I didn't let her eat more bacon before adding it to the cake). People were right this is a very sweet very rich cake. But it was surprisingly easy, despite the caramel aspect. And let me say I never knew I would find so many uses for a jar of caramel syrup, definitely good stuff! will I make this again? You know I think I might. :)

Friday, November 21, 2008

DB: Pizza!

Look what I found! It was hiding on my other blog waiting to be published. See what happens when you don't read your own blogs!

~ BASIC PIZZA DOUGH ~
Original recipe taken from “The Bread Baker’s Apprentice” by Peter Reinhart.

Makes 6 pizza crusts (about 9-12 inches/23-30 cm in diameter).
Ingredients:
4 1/2 Cups all purpose flour, chilled
1 3/4 Tsp Salt
1 Tsp Instant yeast
1/4 Cup Olive oil
1 3/4 Cups Water, ice cold
1 Tb sugar
Semolina/durum flour or cornmeal for dusting

DAY ONE

Method:
1. Mix together the flour, salt and instant yeast in a big bowl

2. Add the oil, sugar and cold water and mix well in order to form a sticky ball of dough. On a clean surface, knead for about 5-7 minutes, until the dough is smooth and the ingredients are homogeneously distributed. If it is too wet, add a little flour (not too much, though) and if it is too dry add 1 or 2 teaspoons extra water.

3. Flour a work surface or counter. Line a jelly pan with baking paper/parchment. Lightly oil the paper.

4. Cut the dough into 6 equal pieces.

5. Sprinkle some flour over the dough. Make sure your hands are dry and then flour them. Gently round each piece into a ball.

NOTE: If the dough sticks to your hands, then dip your hands into the flour again.

6. Transfer the dough balls to the lined jelly pan and mist them generously with spray oil. Slip the pan into plastic bag or enclose in plastic food wrap.

7. Put the pan into the refrigerator and let the dough rest overnight or for up to thee days.

NOTE: You can store the dough balls in a zippered freezer bag if you want to save some of the dough for any future baking. In that case, pour some oil(a few tablespoons only) in a medium bowl and dip each dough ball into the oil, so that it is completely covered in oil. Then put each ball into a separate bag. Store the bags in the freezer for no longer than 3 months. The day before you plan to make pizza, remember to transfer the dough balls from the freezer to the refrigerator.

DAY TWO

8. On the day you plan to eat pizza, exactly 2 hours before you make it, remove the desired number of dough balls from the refrigerator. Dust the counter with flour and spray lightly with oil. Place the dough balls on a floured surface and sprinkle them with flour. Dust your hands with flour and delicately press the dough into disks about 1/2 inch and 5 inches in diameter. Sprinkle with flour and mist with oil. Loosely cover the dough rounds with plastic wrap and then allow to rest for 2 hours.

9. At least 45 minutes before making the pizza, place a baking stone on the lower third of the oven. Preheat the oven as hot as possible (500° F/260° C).

NOTE: If you do not have a baking stone, then use the back of a jelly pan. Do not preheat the pan.

10. Generously sprinkle the back of a jelly pan with semolina/durum flour or cornmeal. Flour your hands (palms, backs and knuckles). Take 1 piece of dough by lifting it with a pastry scraper. Lay the dough across your fists in a very delicate way and carefully stretch it by bouncing it in a circular motion on your hands, and by giving it a little stretch with each bounce. Once the dough has expanded outward, move to a full toss.

NOTE: Make only one pizza at a time.
During the tossing process, if the dough tends to stick to your hands, lay it down on the floured counter and reflour your hands, then continue the tossing and shaping. In case you would be having trouble tossing the dough or if the dough never wants to expand and always springs back, let it rest for approximately 5-20 minutes in order for the gluten to relax fully,then try again. You can also resort to using a rolling pin, although it isn’t as effective as the toss method.


11. When the dough has the shape you want (about 9-12 inches in diameter), place it on the back of the jelly pan, making sure there is enough semolina/durum flour or cornmeal to allow it to slide and not stick to the pan.

12. Lightly top it with sweet or savory toppings of your choice. Remember it is Pizza, it is all about the cheese!

NOTE: Remember that the best pizzas are topped not too generously. No more than 3 or 4 toppings (including sauce and cheese) are sufficient.

13. Slide the garnished pizza onto the stone in the oven or bake directly on the jelly pan. Close the door and bake for about 5-8 minutes.

NOTE: After 2 minutes baking, take a peek. For an even baking, rotate 180°.

If the top gets done before the bottom, you will need to move the stone or jelly pane to a lower shelf before the next round. On the contrary, if the bottom crisps before the cheese caramelizes, then you will need to raise the stone or jelly.

14. Take the pizza out of the oven and transfer it to a cutting board or your plate. In order to allow the cheese to set a little, wait 3-5 minutes before slicing or serving.

Temper's Take:
I went with the classics, Hamburger for Indra and Sweet Italian Turkey Sausage for me. I had to resort to rolling the dough out because it tore and got all thin as soon as I picked it up and then had a big roll of dough on the edge. It was fun to try but I don't think I am cut out to toss pizza. When everything is all said and done I think that a Pumpkin Rendang Pizza would have been killer.

Friday, November 7, 2008

Bedino Blanc


Remember this post where I speculated what a white chocolate version with coconut and pound cake would be like? Well I tried it. It was good, very good.

Bodino Blanc [my version]
Ingredients for 4 servings
3 ounce White chocolate. chopped
1 can Coconut milk
2 large eggs
3 cup cubed (1/2 inch size), toasted pound cake
Confectioners' sugar, for serving
Softly whipped cream, for serving

Recipe Preparation
1. Preheat the oven to 350 F, with a rack in the center. Butter ramekins or mold well

2. Combine the chocolate and coconut milk in a small saucepan over medium heat. Stir occasionally until the chocolate is partially melted. Remove from the heat and stir until completely smooth.

3. In a bowl, beat the eggs well. Whisk in the chocolate mixture; fold in the cake cubes. let the mixture stand for 15 minutes to absorb some of the liquid.

4. Transfer the mixture to the prepared pan. Cover the top with a buttered sheet of foil, buttered side down. Set the pan in a roasting pan and place in the oven. Pour in enough hot tap water to reach about halfway up the sides of the pan.

5. Bake until the pudding is nearly set, but still slightly wobbly, about 35 minutes (the timing can vary based on the size and depth of the pan; do not overbake).

6. Carefully remove the pan from the water bath and cool to lukewarm on a wire rack. Sprinkle with confectioners' sugar, and serve warm, with softly whipped cream.

Tempers Take:
Not as rich as the chocolate version but darn good, the coconut flavor came thru nicely and while the Pound cake started out a little dry and crunchy it was soft and melty by the time I was done. This was even good cold the next morning for breakfast. I kept thinking I needed something a wee bit tart to set it off, maybe some lemon sauce or a little pineapple preserves. I also wish I had let it sit longer so the pound cake could have absorbed more flavors.

This recipe is definitely a keeper for stale cakes of all descriptions, flexible and simple it makes something old new again.

Saturday, November 1, 2008

R2R: Beef Rendang

This month challenge for Recipes to Rival was Beef Rendang. Since I have had limited exposure to curry in my life and have definitly never made it before it was a great challenge.

My first thought when seeing the recipe is that would be darn good with pumpkin, and you know it was. I made half beef and half pumpkin. I really should have done them seperately because of the diffrent cooking times but I am lazy.

The night I made it I had a couple of tortillas with beef and sour cream that was delicious. The rest I packed up and took for lunch the next day with jasmine rice. I learned two things. Rendang is even better the next day and the lights at work are great for pictures.

The pumpkin rendang was great, if I had been thinking I would have had some pepitos to sprinkle on top for crunch. Or maybe some toasted coconut.....

It took me almost 5 hours of simmering to finish this. If / when I do it again I think I am going to try the crockpot so it doesn't have to be watched as closely. I also think I need to make the pickles next time and maybe some flat bread to round it all out. I used sour cream as my condiment of choice but I am thinking a little cucumber and yogurt would be even better. There are just so many options.